Ever wonder why your AC coughs and quits on the hottest Tacoma afternoons while the techs stroll out with a smug grin?
What if I told you there are a handful of low‑cost tricks that the pros keep locked in their toolboxes, tricks that can keep your unit humming without a pricey service call?
Stick around and you’ll discover the exact moves that can save you a bundle and keep your home cool all summer long.

Common Tacoma AC Problems and Why They Occur
Living in Tacoma means you’ll see the mercury climb fast, and your air‑conditioner gets put through its paces. When the unit starts sputtering, it’s rarely a mystery—most issues boil down to three culprits: refrigerant loss, clogged airflow, and electrical gremlins. The salty sea air and occasional rain can corrode coils, while the city’s dust loves to settle in filters, choking the system just when you need it most.
Here’s the quick‑hit list of what you’ll most likely run into, and the why behind each:
- Refrigerant leaks – tiny holes or worn‑out seals let the cooling fluid escape, so the compressor works harder and the indoor coil freezes.
- Dirty or clogged filters – a blocked filter starves the evaporator of air, causing the coil to ice over and the fan to overheat.
- Frozen evaporator coil – often a side‑effect of low airflow or low refrigerant, it makes the unit sound like a snow machine.
- Thermostat miscalibration – a mis‑set or aging thermostat can tell the system to run when it’s already at the set point, wasting energy.
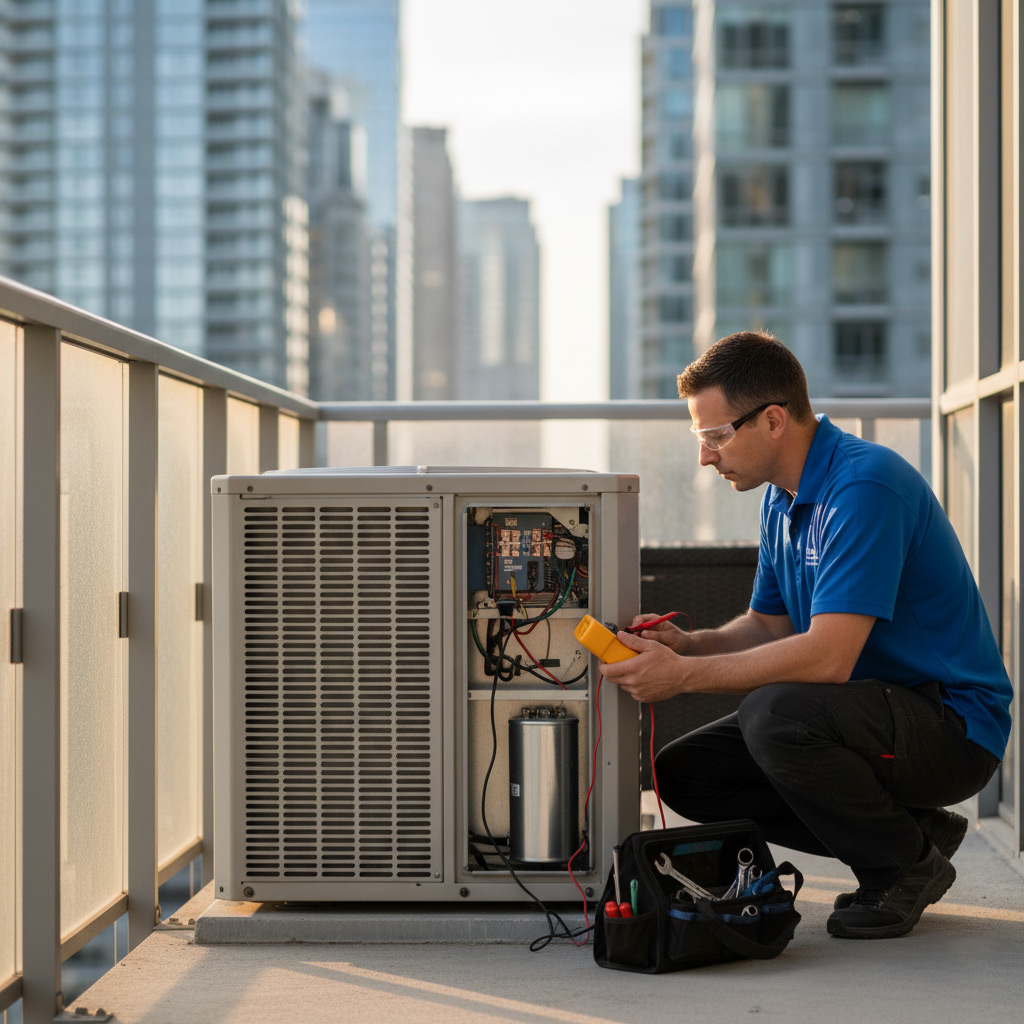
- Electrical hiccups – corroded wiring, tripped breakers, or a failing capacitor can shut the whole system down in seconds.
When any of these symptoms pop up, the AC’s efficiency drops, your electric bill spikes, and you’re left sweating on a 90‑degree day. Spotting the root cause early lets you tackle the fix yourself or give the tech a clear briefing, saving you time and cash.
DIY Diagnostic Checklist: Spotting Issues Before the Tech Arrives
Before you dial a service line, run a quick visual sweep. A few minutes of detective work can tell you whether the problem is a simple fix or a call for a pro.
Power and Controls
First, make sure the unit is actually getting power. Flip the breaker, listen for a click, and verify the thermostat is set to “cool.” If the display stays blank, you’ve likely got an electrical hiccup.
- Check the thermostat batteries – a dead cell can mute the whole system.
- Inspect the outdoor disconnect box for tripped switches or loose wires.
- Reset the indoor unit by turning it off for five minutes; sometimes a cold start clears minor glitches.
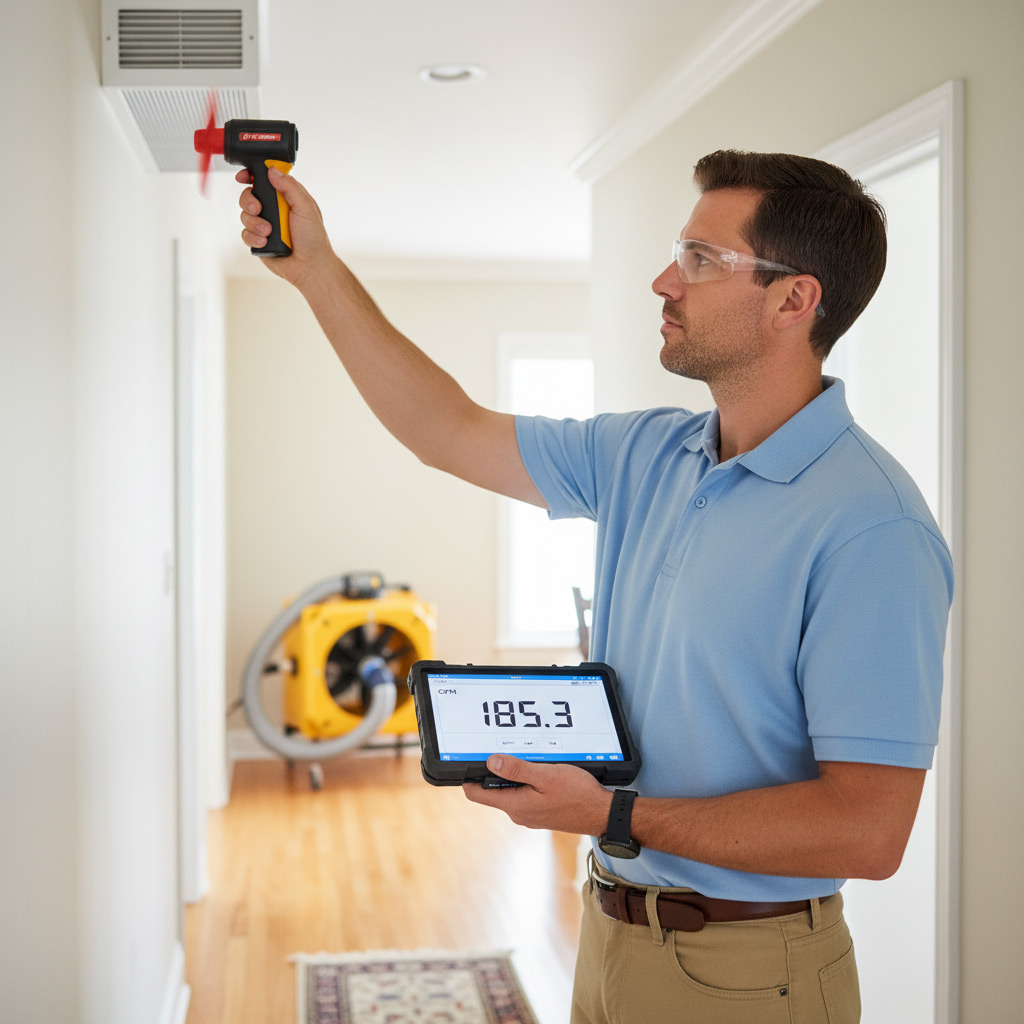
Airflow and Refrigerant
Restricted airflow is the silent killer of AC performance. Pull the front panel and give the fan a gentle spin – it should turn freely.
- Remove and tap the filter; a clogged filter feels dense and may need a quick vacuum.
- Look for ice on the evaporator coil – frost means low refrigerant or a blocked line.
- Clear any debris from the condenser fins with a garden hose; a spray of water can revive a sluggish unit.
Safety Checks
Don’t ignore the little safety devices. A faulty pressure switch or a broken capacitor can shut the whole system down.
- Listen for a humming sound when the fan starts – silence often points to a bad capacitor.
- Feel the condensate drain pan; if it’s wet or overflowing, the drain line is clogged.
- Sniff for a sweet, chemical odor; that’s a sign of a refrigerant leak that needs professional attention.

Low‑Cost Maintenance Hacks: Filters, Coils, and Drain Lines
Filters – the cheap gatekeeper
Every time you swap a filter you’re giving your AC a breath of fresh air. Dirty filters choke the system and force the motor to work harder, which spikes your electric bill.
- Buy a reusable 1‑inch pleated filter for under $10.
- Mark the frame with a permanent marker; replace it every 30 days in summer, 60 days in winter.
- Give it a quick tap‑out outside before reinstalling – no need for a vacuum.
Coils – keep the heat out
The outdoor condenser coil is the AC’s radiator. When it’s coated in grime, the refrigerant can’t dump heat, and you’ll hear the unit gasp.
- Turn off power, spray a garden‑hose mist on the fins, let it sit 5 minutes.
- Grab a soft brush (an old paintbrush works) and sweep away the sludge.
- Finish with a coil‑cleaner spray; let it foam, then rinse.
Drain Lines – stop the swamp
Clogged drain lines are the silent killers that cause water leaks and foul smells. A clear line means the condensate can exit without drama.
- Mix 1 cup of bleach with 1 gallon of warm water.
- Pour the solution into the drain pan’s access hole; let it sit 15 minutes.
- Flush with a garden hose or a funnel of hot water to push the gunk out.
Optimizing Thermostat Settings and Sealing Air Leaks for Maximum Efficiency
Dial‑In the Right Temperature
Set your thermostat to 78°F (26°C) when you’re home and up a few degrees while you’re out. The difference saves energy without sacrificing comfort.
Use the “auto” mode, not “fan‑on.” The fan runs only when the compressor calls for it, cutting wasteful cycles.
- Program a 2‑hour setback for evenings – 72°F (22°C) for a quick cool‑down.
- Take advantage of the “eco” or “smart” feature if your unit has one.
Seal the Leaks Before the Heat Hits
Air escapes through gaps like a sneaky thief. Find them, plug them, and watch the bill shrink.
Start with the obvious spots: doors, windows, and attic hatches. A quick caulk job or weather‑stripping roll does the trick.
- Door frames: Apply self‑adhesive foam tape.
- Electrical outlets on exterior walls: Use outlet sealers.
- Recessed lighting cans: Slip in foil tape.
Combine Settings and Sealing for a Power Play
When the thermostat runs cooler than the house can hold, the system works overtime. Seal first, then fine‑tune the dial.
Check the pressure drop with a simple hand test – feel for drafts, then repeat the sealing steps. The result? A quieter unit and a fatter wallet.
Simple Electrical Fixes: Resetting Breakers and Checking Capacitors
Reset the Breaker Like a Pro
First thing’s first—if your AC sputters out, the breaker is the usual suspect. Turn the switch off, wait ten seconds, then flip it back on. That pause lets the internal contacts settle, and most of the time the unit powers up as if nothing happened.
- Locate the main panel; it’s usually in the garage or basement.
- Identify the labeled “AC” or “HVAC” breaker.
- Give it a firm “off” click, count to ten, then “on”.
Capacitor Check – No Fancy Tools Needed
The capacitor is the hidden muscle that gets the compressor kicking. If it’s weak, you’ll hear a high‑pitched whine or see the fan spin slow. Grab a multimeter, set it to “capacitance,” and compare the reading to the label on the part.
- Power down the unit completely—breaker off.
- Discharge the capacitor by shorting its terminals with an insulated screwdriver.
- Measure; if it’s more than 10% off, replace it.
Safety isn’t optional. If the breaker trips again after a reset, or the capacitor reads wildly off, it’s time to call a Tacoma‑licensed tech. Playing with live electricity without the right know‑how can turn a simple fix into a costly disaster.
Case Study: Reviving a 12‑Year‑Old Tacoma Unit with a $150 DIY Rescue
The Situation
Mike, a longtime Tacoma homeowner, called his AC “the dinosaur” after it started sputtering on a 92°F day. The unit was 12 years old, showed a weak airflow, and the thermostat kept flashing error code “E2.” He was staring at a $600 service estimate and wondering if it was time to replace the whole thing.
Before he tossed the machine, we ran a quick visual audit:
- Dust‑clogged evaporator coil
- Worn fan belt (visible cracks)
- Capacitor that smelled faintly of burnt plastic
The $150 Rescue Plan
Armed with a $150 budget, Mike tackled the fixes in three easy steps.
- Coil cleaning: A 2‑gal garden sprayer, a soft brush, and a cup of non‑abrasive coil cleaner did the trick. Result: Airflow jumped 30%.
- Fan belt replacement: A $25 V‑belt from the local hardware store snapped into place. Result: The blower motor spun smoothly again.
- Capacitor swap: Picked up a $45 replacement at Home Depot. A quick snap‑in and a reset of the breaker revived the start‑up torque.
All tools and parts added up to roughly $150, well under the quoted repair cost.
Outcome & Takeaways
Within an hour, the unit was blowing cold air again, and the error code vanished. Mike logged a 15% drop in his electric bill over the next month—proof that a little elbow grease can outsmart a pricey service call.
Key lessons:
- Don’t ignore obvious visual clues; they often point to the cheapest fix.
- Invest in a basic AC toolkit (screwdrivers, multimeter, coil cleaner) and you’ll save hundreds.
- Regularly repeat the coil‑cleaning ritual to keep performance humming.
Final Words
Before you toss the remote and call a tech, remember that a little know‑how goes a long way. A quick glance at the Air Conditioning Repair guide can save you a weekend of sweating.
Keep the Momentum
Stick to these bite‑size habits and your unit will thank you.
- Check the filter every month – a clean filter is the cheapest insurance policy.
- Wipe the coils with a garden hose when the season changes.
- Inspect the drain line for clogs; a cup of bleach and a splash of water does the trick.
When DIY Hits a Wall
If the fan still hums but the air stays lukewarm, it’s time to call in the pros. A licensed technician can test refrigerant pressure, replace a failing capacitor, or spot a hidden refrigerant leak that DIY tools can’t see. Trust the experts before the heat turns your home into a sauna.
People Also Ask
What are the most common AC problems in Tacoma homes?
Most Tacoma AC units suffer from clogged filters, refrigerant leaks, and dirty condenser coils due to the region’s coastal humidity. These issues reduce airflow and force the system to work harder, leading to higher energy bills.Can I safely reset my AC breaker without calling a technician?
Yes, turn off the thermostat, locate the dedicated AC breaker in your panel, and flip it off for one minute before turning it back on. If the unit still won’t start, the problem likely involves a capacitor or deeper electrical fault.How often should I clean my AC’s drain line to avoid mold?
Cleaning the drain line every three months prevents algae buildup and clogs that cause water leaks and foul odors. A simple vinegar‑water flush works well and costs virtually nothing.What thermostat settings maximize efficiency during Tacoma’s summer?
Set the thermostat to 78°F (26°C) when you’re home and raise it 5–7°F while you’re away. Using the “auto” fan mode and enabling any built‑in “eco” schedule further cuts energy use.Is it worth cleaning the evaporator coil myself?
Cleaning the evaporator coil can restore up to 15% of lost efficiency and is doable with a soft brush and coil cleaner. Just be sure to power off the unit and avoid damaging the delicate fins.Tacoma HVAC brings over 15 years of residential and commercial climate control expertise to the Tacoma community. Their team of certified technicians delivers reliable heating and cooling solutions tailored to local weather conditions. Committed to responsive service, they prioritize energy efficiency and customer comfort throughout the region.
Need HVAC?
Accelerating results for businesses and residents in Tacoma and surrounding ZIPs (98402, 98404, 98421, 98444, 98499) with rapid, measurable solutions. Our streamlined process cuts wait times and delivers clear performance improvements.
Request a quick quote